Baby Blocks Tutorial August 7, 2011 – Posted in: Sewing, Tutorials
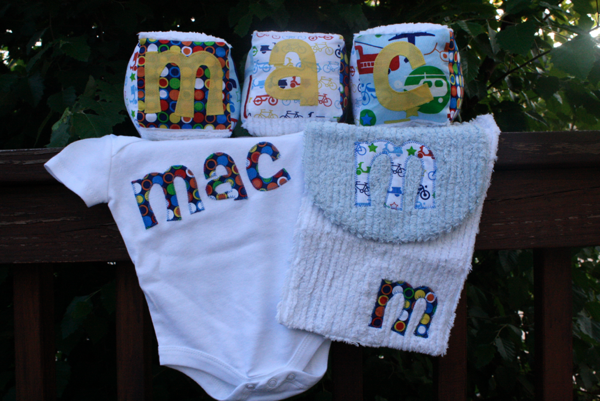
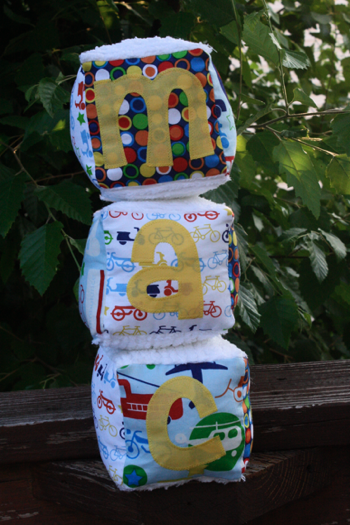
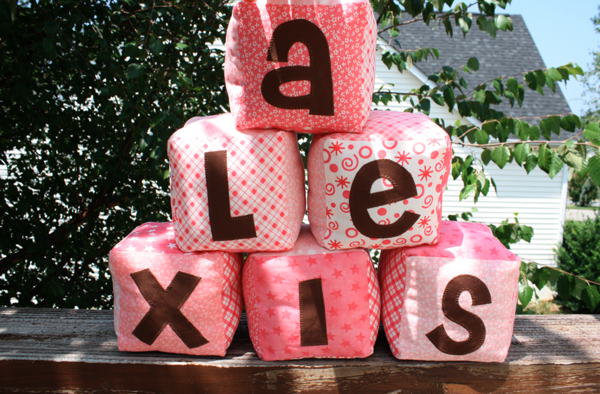
One of the things I love the most about being able to sew, is being able to make just about whatever I want. One of my favorite things to create is unique and personalized baby gifts. Last year I made this one for a friend to give to a friend of hers.
The blocks were a huge hit!
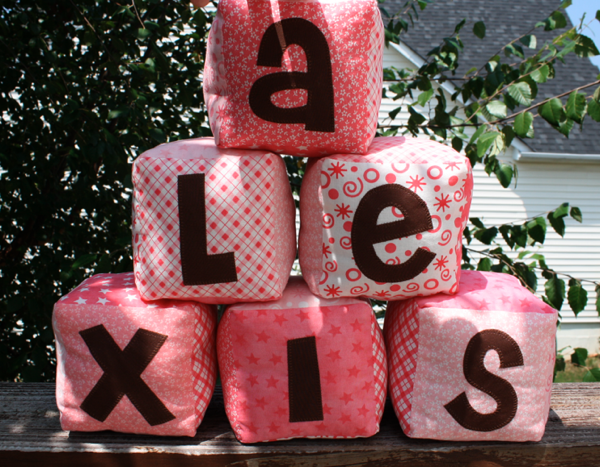
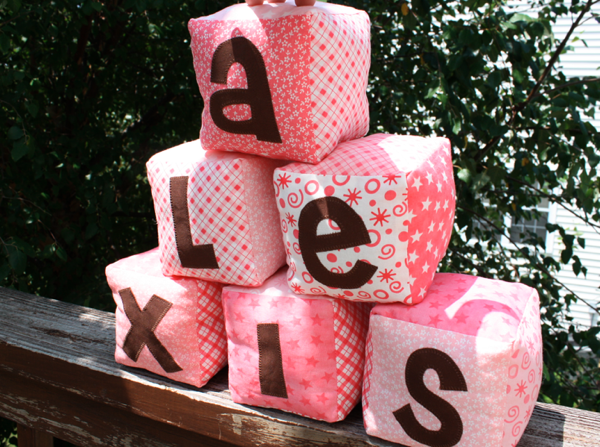
So this year, I got another request for baby blocks—this time for a baby girl.
I got to choose the fabric for these, and I really love all the pinks together.
As I made them, I took pictures so I could share the very easy process of making these adorable little blocks!
You’ll need:
-assortment of fabrics, six 5″ squares per block
-scrap pieces of fabric for applique
-polyfil
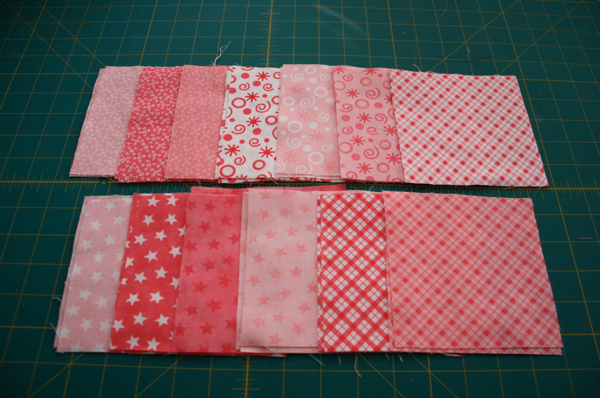
To start, choose your fabrics. I’ve had these forever and love them so much!
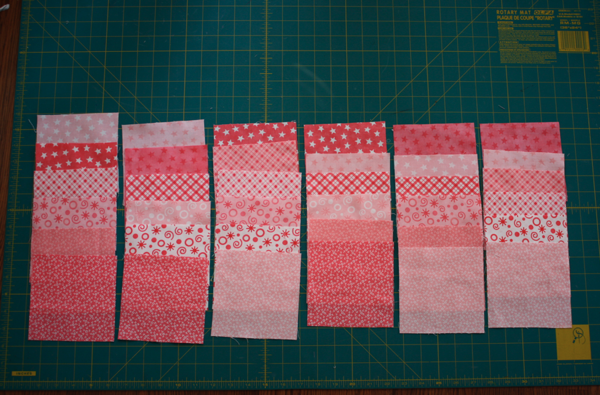
Cut 6 for each block you’re making and arrange them in an order you like. I didn’t want to have any 2 blocks exactly the same.
Then lay them out. I don’t want any of the same pattern to be next to each other so I like to get them all in order before I begin sewing.
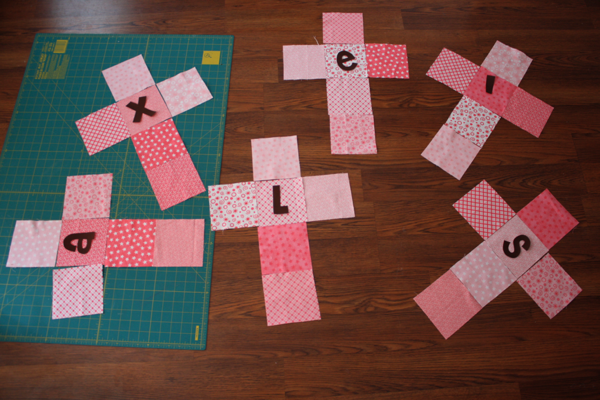
Then to mix up the way they’re arranged, I lay out my applique letters and make sure I like the order they’re in.
Whew! That’s a lot of planning! But it really helps to be on top of it like that to avoid mistakes later.
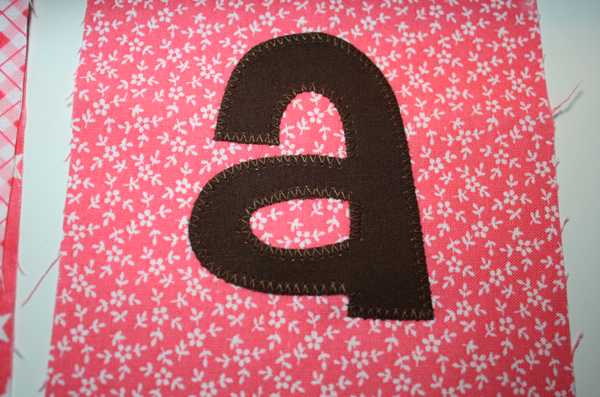
Then I applique my letters to each designated square.
And I’m ready to start assembling! I lay them on the floor next to my machine in the “right” order.
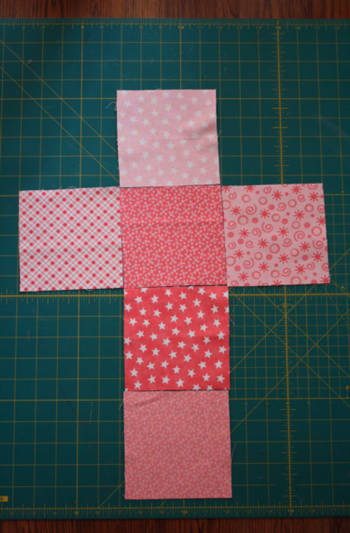
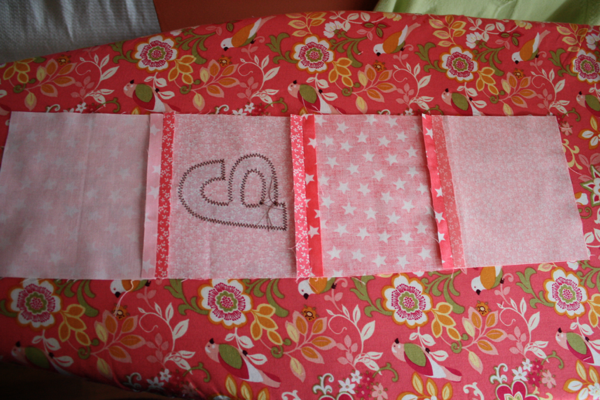
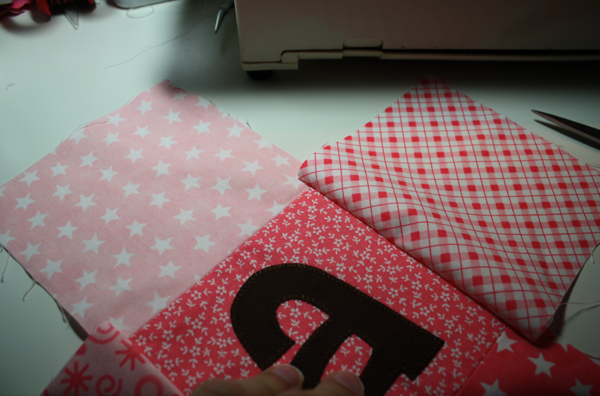
To begin, I sew the middle 4 squares together using 3/8″ seam allowance, then press my seams open.
Then attach the blocks on either side of the appliqued one. When you attach them, only sew them to the one square, not end to end.
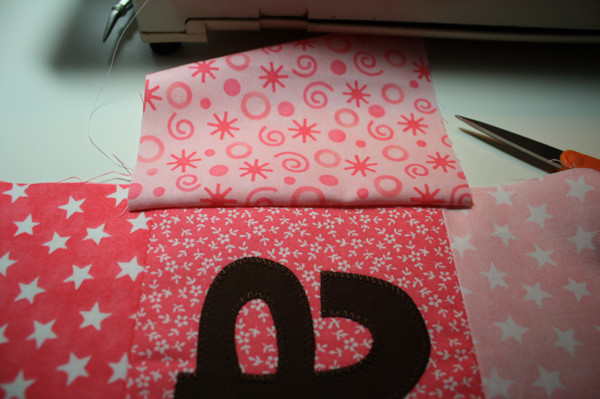
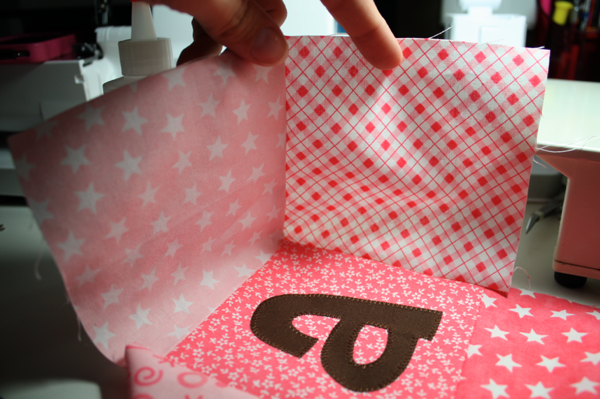
Then you’re going to start attaching your sides.
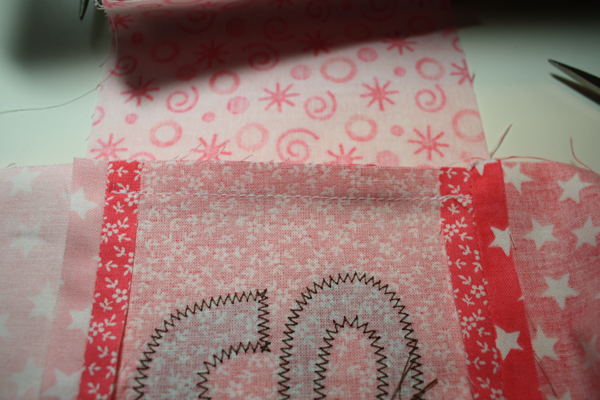
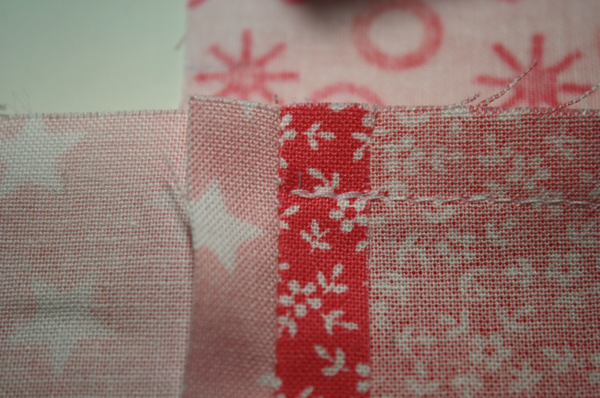
I always do mine in the same order, but it’s totally a personal preference. To sew the sides together, just match them up along the straight edge and sew with right sides together. Remember we’re using a 3/8″ seam allowance so you’ll want to start and stop 3/8″ from each edge.
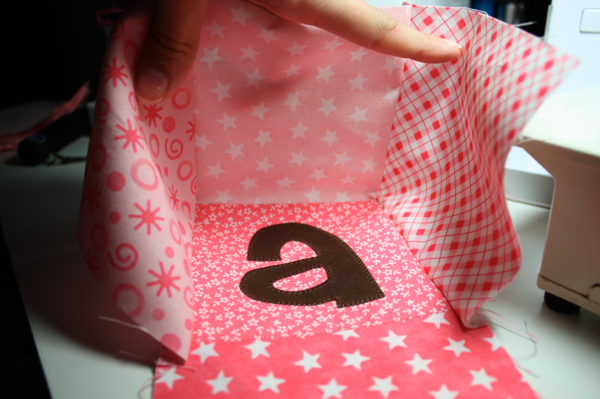
Then attach the next 2 sides.
And continue around the block.
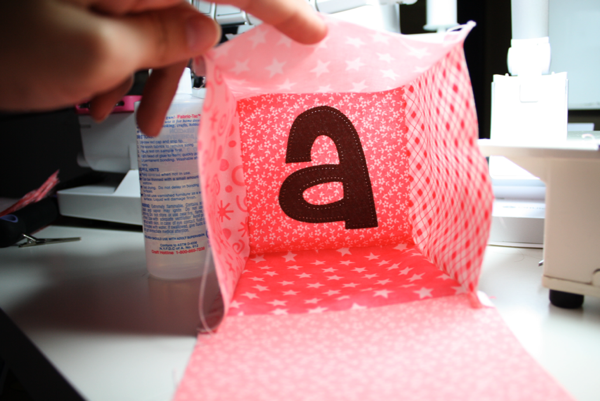
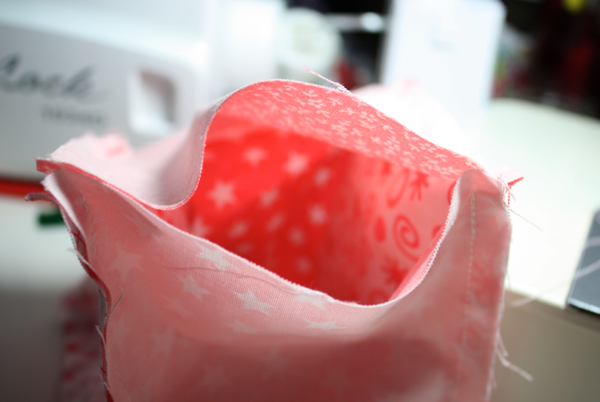
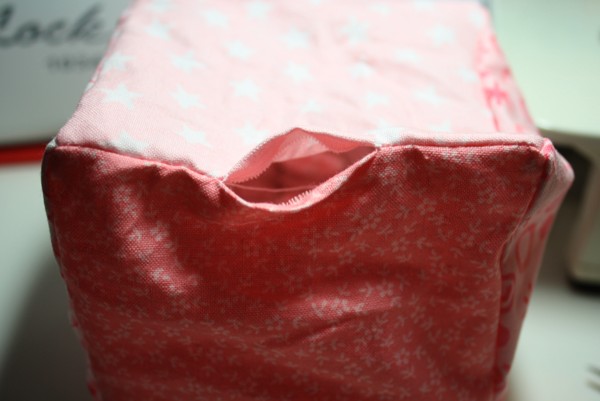
When you get to the last side, you’ll need to leave a hole to turn the block through and stuff.
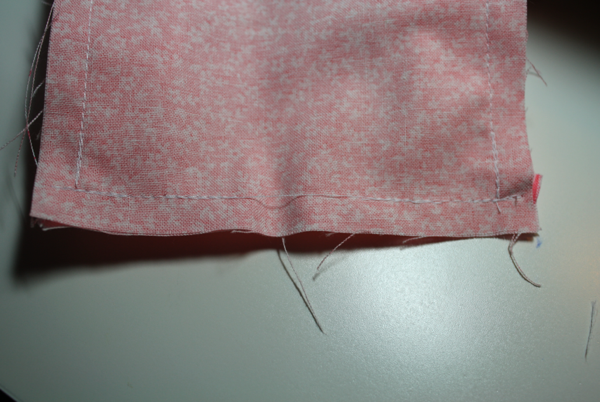
I start at the edge, sew about 1/3 of the way across and backstitch, then lift my presser foot and move about 2″, then sew and backstitch and continue to the other side.
Then I simply clip the threads and have an easy opening!
Turn the block through the hole, poke the corners out with a chop stick or pencil, and stuff!
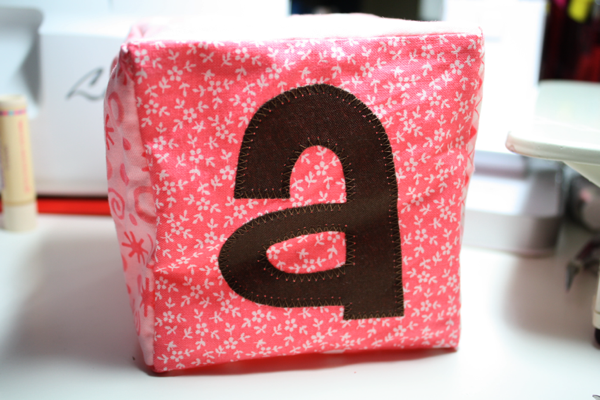
Whipstitch the holes closed and you’re done! Easy as pie baby gift!




50 Comments
Joanna Tutinella August 07, 2011 - 14:00
Thanks for this tutorial! My sister-in-law is expecting and I must make this as soon as they baby is born 🙂 It’s really a great gift!
chari August 07, 2011 - 17:41
really cute! what font style is that? I really like it!
ebz August 08, 2011 - 23:25
they look great Melissa! I have been making them plain but what a great idea to add the letters! ~ eBz
Elise August 09, 2011 - 06:01
Hello!
I am making blocks for a friend’s baby (but with no name as the baby has no name yet, and in unisex colours too!) and I wanted to tell you I am sewing in some eggs from a Kinder Surprise (the little yellow plastic eggs that sit inside). One has dry rice in and one a single, large, plastic bead. Another has a couple of kidney beans. This makes them all make different rattling noises which I hope will engage the baby. I’m also sewing some plastic from an old bag into a fourth block so that it will crinkle.
Jessica August 10, 2011 - 16:48
I love this! And I love the tip from Elise about ways to make them rattle too! But I have a question…How do you cut several squares and get them to all come out the same? So many times I have cut squares for projects or blankets, and then when I go to start sewing them together, things don’t line up right 🙁 any advice would be great! I am self-taught, and have only been sewing for a few months. Thanks!
Melissa August 11, 2011 - 10:35 – In reply to: Jessica
Thank you! Unfortunately we can’t get Kinder Eggs here in the States (and oh how I miss them!), but you can do the same idea with small plastic easter eggs.
As for cutting my squares, I use a rotary cutter and mat with a large plastic ruler to cut mine. It makes them perfect squares each and every time! If you want to get a self-healing mat and rotary cutter, make sure you get them from a store like JoAnn’s or Hancock where you can use a coupon to save a bundle because those puppies are pricey (but worth it!).
Elise August 12, 2011 - 08:12
Sorry, I totally didn’t realise you wouldn’t be able to get Kinder Eggs! I did live there for 3 years when I was younger, but there was so much to see and so many wonderful things to eat and try I never missed them!
I am about to embark on making my husband a fabric painting for our 5-year anniversary (I’m going to represent the lyric “We have all the time in the world for love” in fabric on a canvas) and I plan to use your appliqué tutorial to make it gorgeous. I have sewn my entire life but never used a sewing machine until a month or so ago (I’m 29!) and having such comprehensive tutorials online REALLY makes a difference.
This is my favourite blog 🙂
Baby Soft Blocks and Tutorial Link « Today August 24, 2011 - 05:50
[…] for it. The fact that M-A-R-Y only has four letters kind of sealed the deal.I loosely followed this tutorial. They were really fun to make and they whip up pretty […]
Kreativ-Links, Teil 11 – Abraxandria September 16, 2011 - 04:32
[…] Nähen: Süße Baby Blocks, eine Vintage Flaggenkette, eine Mülltasche fürs Auto (vielleicht etwas unpraktisch, dass […]
Baby Soft Blocks and Tutorial Link « elineuponline.com September 28, 2011 - 05:26
[…] for it. The fact that M-A-R-Y only has four letters kind of sealed the deal.I loosely followed this tutorial. They were really fun to make and they whip up pretty […]
Emily H October 26, 2011 - 13:09
I’m in the middle of making the second set of these. Everyone loves them! I have found it slightly easier to get the squares to match up in the final stages lined up by stitching the top edge of the top square (when the cross shape is laid out flat) to the bottom edge of the bottom square to create a ‘hollow’ cube. I found it easier to then line up the ‘lid’ and ‘base’. Can’t wait to finish this set and give them to my friends and their new arrival! Thanks for the great blogs!
Personalized Soft Blocks | . . a barefoot bride . . November 22, 2011 - 21:27
[…] blocks were so much fun to make! I came across the tutorial here, and when I found these fabric sets at Joann’s Fabrics, I knew immediately that I had to try […]
Amy January 25, 2012 - 13:35
How are the letters done? Did you use a machine or just a template? I don’t have a machine so how could I cut/get nice letters? I have several family members having babies this summer so plan to make these to save some money on gifts!
Jackie January 26, 2012 - 11:50
Thank you so much for posting this tutorial! I just finished my first set of blocks for my new baby niece and I love them! Can’t wait to make more. Just one thing I added because of a suggestion from a friend who had made them as well-I put bells, rattles, and plastic bags in along with the stuffing to make the blocks a little more appealing to little hands. Now they jingle, rattle, and crinkle. I got a multipack of cat toys at the dollar store for the jingles and rattles. They were the perfect size to put into the blocks.
Diana March 11, 2012 - 12:12
Do you make these to order? If so, how much? They are wonderful, but I can’t sew! :o(
Kirsten Anderson March 13, 2012 - 23:28
Thank you so much for posting this amazing tutorial! I just became an aunt and my little niece is going to love these when she gets a bit bigger. For now, they are going to look so cute displayed on a shelf in her room. Thanks again, I really love your blog and have so much fun trying all your sewing ideas.
Lesli May 07, 2012 - 01:20
Thank you so much for this! My friend is having a baby girl this summer and I knocked these out yesterday for her! I love how the blocks turned out so i’m going to try a bib and the bean bag taggie to go with!
Shayla July 13, 2012 - 08:52
This is perfect! I’m planning a baby shower and wanted to decorate the panels for blocks instead of onsies, but needed an easy how-to to be able to put them together. Thanks!!
Marlisa August 13, 2012 - 11:35
I use my embroidery machine instead of applique to add letters to the blocks. Then I can sew cute things on the other sides to keep it interesting for the baby.
vmarie August 13, 2012 - 22:49
Great gift for baby. I have plenty of unused material and will be making these gifts and getting them out the way. Also, I am going to sell some at a handmade crafting show next month.
Melissa August 15, 2012 - 00:59 – In reply to: vmarie
I would appreciate if you didn’t sell them. There’s a disclaimer on my sidebar that asks you only use my tutorials for personal use. Obviously I won’t know if you really do or not, but I’m hoping you choose not to.
Amanda August 31, 2012 - 08:13
Hello,
I think this is such a fun idea! I was wondering how you made the letters as well. Also I was wandering how much fabric I would need to buy if I am making 4 blocks, 6 different fabrics? Thanks for the help!
Melissa August 31, 2012 - 10:09 – In reply to: Amanda
To make 4 blocks with 6 fabrics, you would need 5″ of each fabric, by the width of the fabric (45″). If you’re buying fabric, I’d buy an extra inch or two since fabric is generally not cut very straight. Then you’ll need a little extra, depending on what you’re using for your letters. To make the letters, I use MS Word on my computer and blow the letters up large, flip them backwards, then trace them directly from my computer screen. If you go up to my Tutorials tab and look for the applique tutorial I show how to do it. Hope that helps!
Personalized Soft Blocks | a barefoot bride August 31, 2012 - 10:39
[…] 22, 2011 by prayse Pin ItThese blocks were so much fun to make! I came across the tutorial here, and when I found these fabric sets at Joann’s Fabrics, I knew immediately that I had to try […]
Clarissa October 10, 2012 - 16:06
I used this tutorial for the blocks I made my friend’s baby and they were much appreciated. ^_^ And I also stole Elise’s brilliant Kinder Egg idea. They were great fun to make! (tho it took me aaaaaaaaages, haha. I’m still so slow)
Baby blocks | aimswenk October 16, 2012 - 09:17
[…] (this is where I got the idea and the directions) Share this:TwitterFacebookLike this:LikeBe the first to like this. This entry was posted in Uncategorized. Bookmark the permalink. ← A crafty place […]
Tips for Buying Baby Gifts | Jackie Dives December 07, 2012 - 19:30
[…] Personalize The first time I had the opportunity to buy a baby gift was for my friend Adrian’s first baby. I bought a set of classic wooden blocks with the letters carved into them. Adrian is a writer and was touched by the gift. “You gave my baby her first set of words!” Making baby blocks can also be a very special gift and allows you the ability to personalize the blocks with images that are special for the parents. Wooden blocks tutorial. Cloth blocks tutorial. […]
Baby Blocks | craftysorcha January 31, 2013 - 07:50
[…] for my nephew’s Christmas stocking! I followed the “Sew like my Mother” tutorial: https://sewlikemymom.com/baby-blocks-tutorial/, which is very quick and easy to follow. The fabric is Urban Zoologie, which I already had in my […]
Sew Fabric Blocks From Old Clothing | Powerful Mothering February 25, 2013 - 07:18
[…] cut the squares out in 5 inch by 5 inch squares as suggested by Sew like my mom’s awesome Baby Blocks Tutorial. My blocks have the addition of […]
Janice Sheldon April 30, 2013 - 11:36
I may have missed it, but do you stuff these blocks? And, if you do, what do you stuff them with. They are so cute. I like to make baby sets (bibs, burp cloths & binkie straps) for baby showers at our church, and I’d love to add a couple of baby blocks. Thanks for the info.
Melissa April 30, 2013 - 20:43 – In reply to: Janice Sheldon
Yes, the very last thing I do is stuff them with regular batting, like the bags of polyfil.
Janice Sheldon April 30, 2013 - 23:11
Thank you so much.
Debbie May 29, 2013 - 08:06
I love this idea. I have some charm packs that would work great for this. Already cut and waiting to be used. Where do you find the letters for the applique? I am attending a baby shower on Saturday. This would be a great extra gift to give. thanks so much!
Casey July 06, 2013 - 23:01
I just love this idea. I was wondering how I can find a download for the letters. please help. Thank you!
BERNY September 18, 2013 - 14:17
THIS IS AN AWESOME CRAFT AND WOULD BE SO AWESOME TO SEW. I HAVE ADDED IT TO MY FAVORITES AND AM EXCITED TO MAKE 1 OR SEVERAL. THANK YOU FOR SHARING
Bernysblessings.blogspot.com
diy christmas | made by caren December 31, 2013 - 12:09
[…] favorite 1 year old…baby blocks https://sewlikemymom.com/baby-blocks-tutorial/ […]
10 Handmade Gift Ideas for the Sewist (Baby Edition) - Sewplicity February 10, 2014 - 08:39
[…] Baby Blocks […]
Alphabet blocks | Love It Handmade March 20, 2014 - 16:13
[…] block “A”, I followed THESE DIRECTIONS for sewing the blocks together. First sewing the 4 vertical blocks together, (using a 1/2″ […]
9 DIY Gift Ideas Because Christmas is Coming! | Kellita Makes October 01, 2014 - 05:32
[…] look easy to make but Carmen won’t get brain damage when Henry throws them at her head. The how-to is on Sew Like My […]
{Gift Guide 2013} Babies & Toddlers (& A SURPRISE!) | While He Was Napping October 28, 2014 - 18:32
[…] Crap I’ve Made on U-Create 11. Colors Scrap Book at Everyday Celebrations 12. Baby Block on Sew Like My Mom 13. Baby Booster at Prudent Baby 14. Wipe Container Toy Upcycle at A Spotted Pony 15. […]
Choosing the Best Toys For Newborns December 23, 2014 - 17:15
[…] soft, cloth blocks instead of plastic or wooden ones because they are considerably safer – or make them yourself! Babies love to play with blocks well after their first birthday, so you definitely get your […]
קוביות או לא להיות BABY FABRIC CUBES - קבוצת אמהות משקיעות February 05, 2015 - 14:05
[…] https://sewlikemymom.com/baby-blocks-tutorial […]
Sue September 18, 2015 - 06:02
Thank you for this tutorial. I just made this for a special little baby named Lisa.
How Do I Join Corners? November 15, 2015 - 21:22
[…] tutorial should give you a good visual where to stop stitching on the flap pieces. Baby Blocks Tutorial – Sew Like My Mom | Sew Like My Mom Reply With […]
Preemie Sized Baby Block - Bambino Designs by J January 27, 2016 - 19:32
[…] read this tutorial on how to sew a fabric cube! It has all of the […]
Laurence W May 31, 2016 - 01:21
Thanks a lot for this great tutorial !
Rose June 26, 2016 - 19:10
I love these. I think I’m going to make them for my month to month photos as the baby grows. Thank you for posting this.
Baby Name Blocks | Bittersweet Haven and Other Random Stuff July 02, 2016 - 18:19
[…] I haven’t been able to make a tutorial for this but I followed one from this site and the instructions are very […]
Kuber – Softie heaven September 07, 2018 - 11:08
[…] Jeg laver disse kuber i stof 10 x 10 cm og med en rasleboks indeni. Kuber […]
Cubes/blocks – Softie heaven September 13, 2018 - 12:39
[…] I have made these boxes fra fabric 10 x 10 cm and put a rattle box in the middle. Perfect for babies. Block […]