Military Uniform Tote November 11, 2011 – Posted in: Sewing, Tutorials
Happy Veterans Day! Today I have a really special project to share. And since I grew up an Army brat, this one is near and dear to my heart.
Usually I share projects I make for my friends. But this time I was contacted by a friend who was making the bag for one of her friends. She wanted some help on construction so I documented our process to share. I love this idea and I’m completely excited with how it all turned out!
These totes are all the rage with military wives and Moms and with an ACU jacket and a few hours, you can have your own!
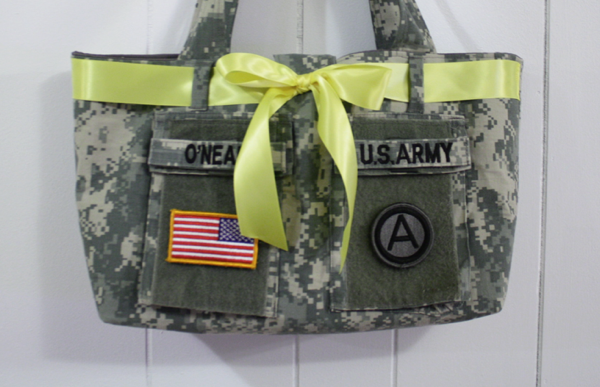
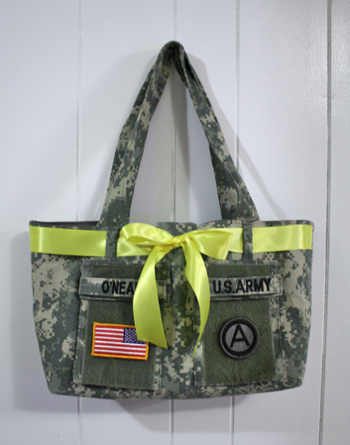
We had to buy few materials to make our bag–just lining fabric, thread, and ribbon–the rest was recycled from the uniform. The bag is 15″ wide, 10″ tall and 4″ deep.
(In the interest of full disclosure, I didn’t sew anything on this bag. My friend did all the sewing, I just did the math, some seam ripping, some pinning, and the picture taking.)
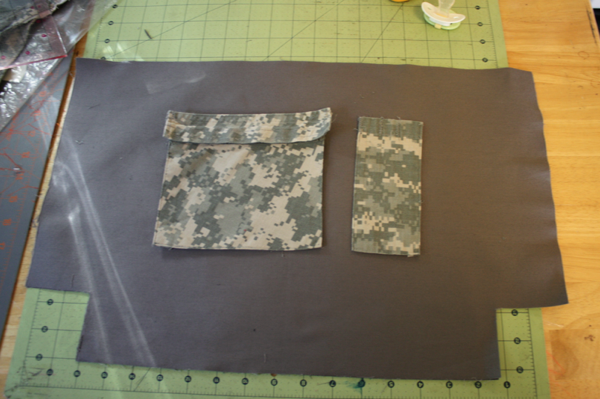
We removed the pockets we wanted to use: two from the arms, one from the chest, the pen pocket from the arm, and a tab from the wrist.
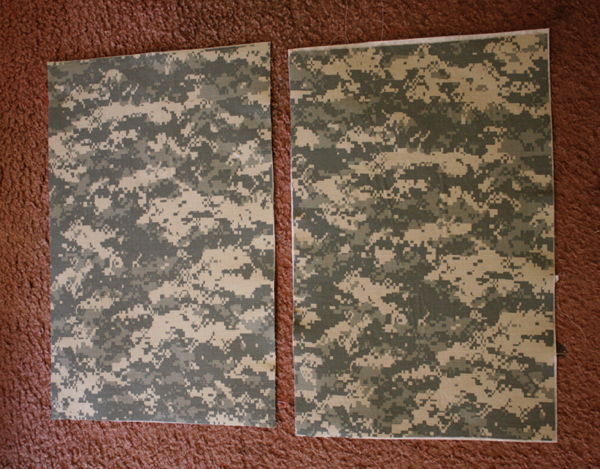
Then we cut the main body of the bag 20″ by 13″. We cut our pieces from 2 uniforms, but if you’re creative, you could get them both from the same jacket.
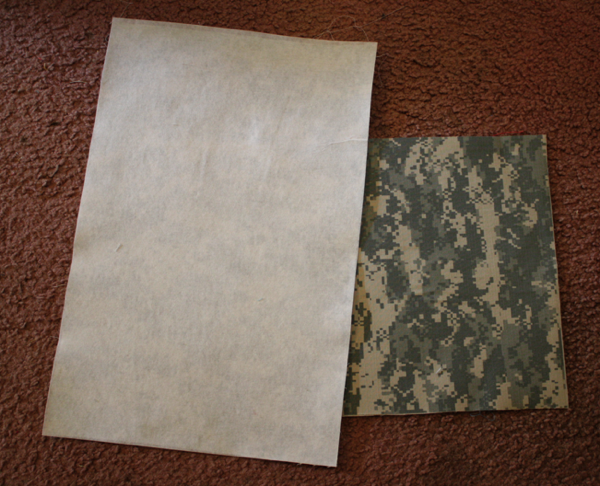
Apply medium weight fusible interfacing to the back of the outsides.
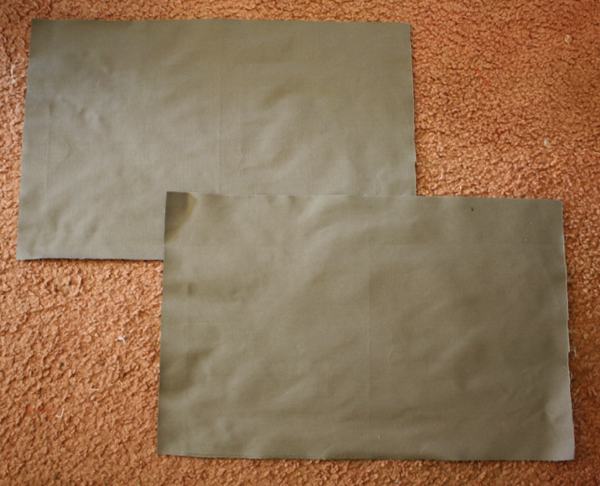
We cut 2 pieces the same size from the lining fabric.
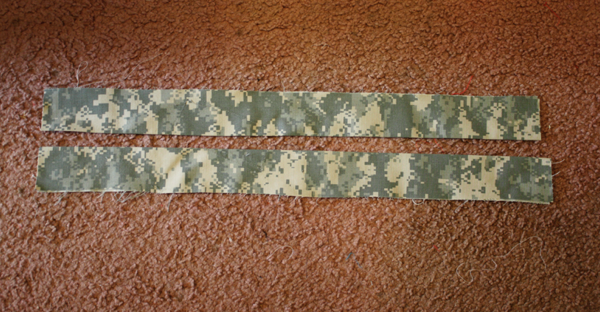
And cut 2 pieces approximately 4.5″ wide and 26″ long for the straps.
We started by sewing the straps. Fold right sides together and sew down the length of each strap. Using a safety pin, turn them right side out, press, and top stitch down each side.
Then using the breast pocket and pen pocket, we placed them on one of the lining pieces and stitched down. Cut 2.5″ squares out of each bottom corner for your bag bottom and sides.
Assemble the lining, leaving a hole to turn the finished bag through.
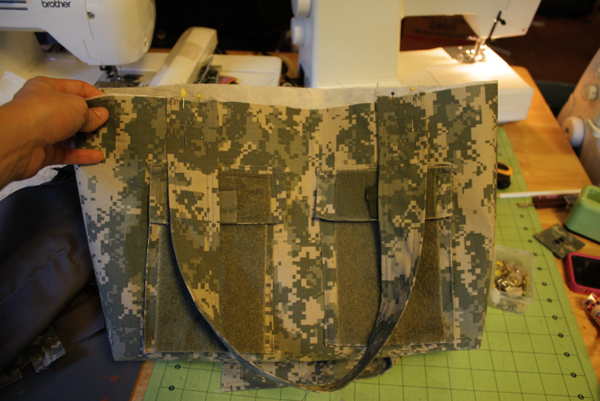
Place the two remaining pockets on the front of the bag, stitching them on as well. Again, cut 2.5″ squares for the bottom and sides.
Then sew the outsides together.
Pin the straps to the outside of the bag on each side.
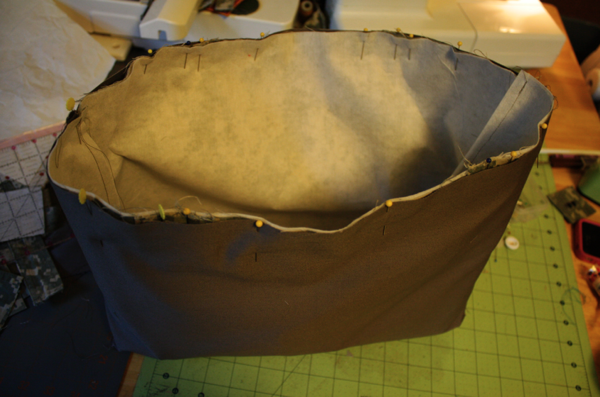
With right sides together, put the outside inside the lining and pin. Sew around the top to attach the lining to the bag, catching the handles.
Turn the bag through the hole you left in the lining, close the hole, and top stitch around the top of the bag.
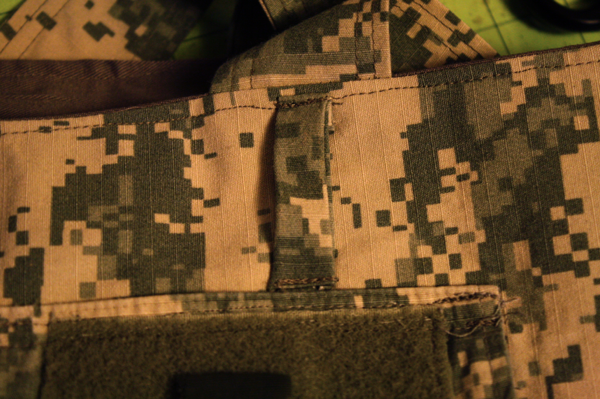
Make little belt loops using scraps 1.5″ wide and about 2″ long. Sew them to the front.
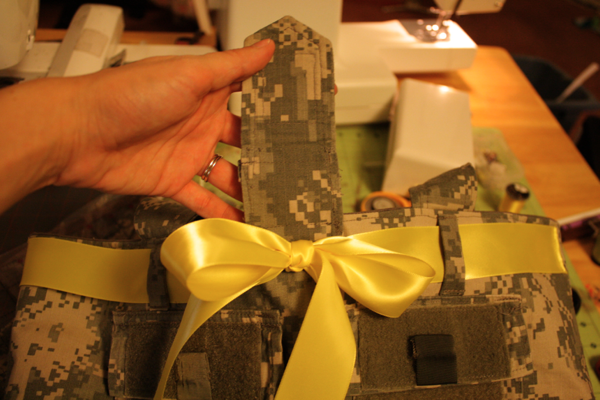
Sew the ribbon at the side seams, feeding it through the loops and tying it into a bow. I tacked the bow to the bag by hand to secure it in place.
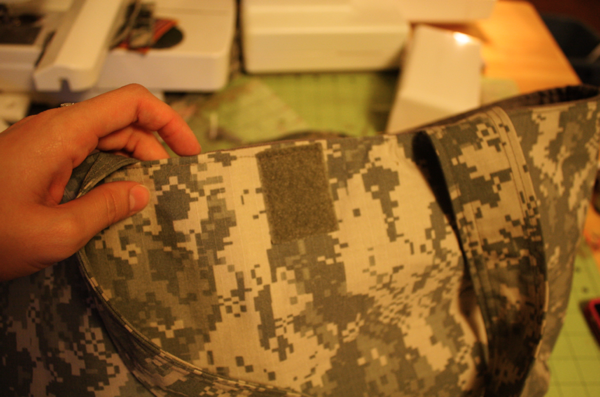
Lastly, take the tab from the sleeve and sew it to the front of the bag and attach the velcro to the outside on the back to secure it.
That’s it! Simple, precious, and totally customizable for the soldier you love.
A special thank you to all our veterans for your service. I’m grateful for your sacrifices and proud to be an American!





47 Comments
REBEKAH November 11, 2011 - 16:16
i made a diaper bag using an old army uniform that my husband wasn’t wearing anymore. it’s a great idea!! super cute too!
Dani November 11, 2011 - 16:45
That is awesome!! Nice work ladies!!! I would love to do that to my Gramps uniform!!
Melissa M November 17, 2011 - 17:25
This is awesome! I don’t think my hubby would let me cut up his jacket though. I should ask my SIL to send me one of my brothers old jackets and I could make her a bag.
Samantha December 15, 2011 - 16:48
CAN’T WAIT TO TRY THIS! Thanks so much for posting this awesome tutorial, been looking everywhere for something like this!
Amy O. January 01, 2012 - 23:20
Thanks for sharing this tutorial, I have all the supplies to make one of my own, but I want a zipper close top and I’m zipper phobic… Any zipper tips would be appreciated!
Jana January 07, 2012 - 21:00
this is so awesome! i want one so badly now. however, i do not sew and don’t have a sewing machine..anyway to get these made from somewhere for a cheap price?
Melissa January 08, 2012 - 11:20 – In reply to: Jana
Unfortunately, most people that sell these charge an arm and a leg, and you still have to provide the uniform pieces. Do you know someone who sews that could make one for you?
Alicia January 13, 2012 - 00:05
I have bought the same material at the Army Navy Surplus store to make crafts without cutting up a uniform.
Natalie January 17, 2012 - 13:15
my sister makes these and sells them. I think they are awesome
http://www.holdyourhero.com/
Jan January 28, 2012 - 19:33
I’m not a seamstress… wish I were! Anybody here willing to make me one??
Cathie February 01, 2012 - 02:26
I just finished mine… a little rough for my first try, but it looks awesome! Thanks for the idea!
Allison February 01, 2012 - 17:53
FYI if you live anywhere close to military post or base, Goodwills or thrift shops will often have gently used military uniforms etc for a very low cost.
Ruth Ann February 17, 2012 - 12:14
Love your tite, but thought you’d like to know that your flag is on backwards Fhe field of stars is always at the top left.
Hope this helps!
Melissa February 17, 2012 - 12:23 – In reply to: Ruth Ann
Hi Ruth Ann! Actually, the flag isn’t backwards. 🙂 This is the patch straight off the soldiers uniform and the flag patches are intentionally made “backwards” because as you walk carrying a flag, it blows behind you giving the appearance of being backwards. My Dad was in the Army for 30 years, I wouldn’t make a mistake like that. 🙂 You can read more about it here: http://www.usflag.org/flagpatch.html
Kim February 20, 2012 - 10:27
I got my son to send my some old ACU’s and my friend and I are going to work on making me one soon! Thank you so much for posting, and inspiration for making this!! I will post pictures when we are done on your facebook page! Thanks again!
Kim
Army Mom!
Marie February 21, 2012 - 18:19
These are so cute! I’ve been looking for a tutorial for these for a long time! I’m confused with the tutorial though, what’s the purpose of making the 2.5″ square cuts, and how do you sew around them? Thanks!
Suzanne February 21, 2012 - 18:34
I really love this bag! Now if only I could talk my little brother out of some cammies!
Ashley February 28, 2012 - 16:41
Hi! I was just wondering if you had any patterns to go off of. Would be a lot easier – esp. with two little ones (under the age of 1 year) in the house to make it a stop and go type of project!
tracey February 28, 2012 - 21:05
I love this!! I am not only an Army wife, I am a Veteran of 14 years. 2 depoyments after 911 and I decided to get out to start a family. This would be awesome if I could make a few out of my old uniforms. Thanks so much for this.
Peggy February 29, 2012 - 18:19
My daughter and I went through all sorts of diaper bag patterns at JoAnn’s trying to figure out how to make a bag that looks like yours. Most were sold out. I was thrilled to find your website showing such great pictures on how to do this step by step. Thanks so much!
Peggy March 08, 2012 - 17:50
Using the ACU jacket gave me an opportunity to customize the bag. I even put the pencil holder on the handle. We made a single handle put on each end. However, I had no clue on how to sew the box corners. I did have to Google it. Luckily my friend stopped over and she showed me. The instructions said to sew the pieces together, so I did. You do NOT sew the cut out area until you open it up and sew them separate. Possibly it would be easier to sew a square and then sew across the diagonal on the bottom of the bag.
Julie Wertz March 23, 2012 - 20:28
i attempted this just a few minutes ago. Let it be known that when sewing the bag together SEW the sides, then the bottom then sew the part where you cut out the 2.5 in squares in the opposite direction of the other 2 seams, if you sew the sides and the bottom and have no clue what Im talking about look in the bag and make it look like a rectangle, you will see where the seam needs to be. Great bag though! I love it and look forward to making many of these as gifts.
Megan April 24, 2012 - 17:12
Julie thank you so much! I was just trying to figure that out!! And if anybody likes the idea but just wants it made for them I’d be happy to! I don’t charge an arm & a leg because I live near an army post and can get ACU’s for a good price. Sweetyellowrose@gmail.com
Tiffany May 24, 2012 - 19:04
Hi I think your bag is cute and the finished product is nice but your instructions are sooooooo vague. Even a seasoned seamstress would have a hard time following. Maybe add more detailed instructions? Thank you for the basic info though!
Jennifer August 29, 2012 - 19:33
I am new to all this sewing and Im a lil confused by one thing. In the tutorial you said to leave a hole in the lining for later. Im confused as to where and how to flip it back into the purse for the lining. Any help would be great cause I really wanna make this bag and us it as a diaper bag.
Melissa August 31, 2012 - 10:04 – In reply to: Jennifer
Yes, if you’ll Google tutorials on how to make a basic tote bag you’ll see how it works. You leave a hole in the bottom seam of the lining so after you sew the lining and outsides together you can turn the whole bag through the hole and sew it closed.
Jennifer September 02, 2012 - 17:54
OK that is what I thought but was unsure. Now because Im new to this if I wanted to put batting in there how would I do that? Thanks for the help but just starting to learn everything.
Melissa September 02, 2012 - 18:15 – In reply to: Jennifer
You would apply the batting to the wrong side of the outside pieces before you start to assemble.
Paige Bishop September 18, 2012 - 23:02
Is there anyway that you could take an order and make one for me? If you wouldnt mind sending me and email letting me know I’d appreciate it. Thanks
Liz October 01, 2012 - 20:49
Hi I don’t sew but I want to have one of these made. I have my brothers acu jacket and would work out a price to get it made and would pay for the shipping from your house to mine before and after made. If anyone is interested on taking on this project for me please contact me at my email lizlovespeanutbutter@gmail.com or cell phone call or text 5154199672
Diane March 04, 2013 - 11:38
Thank you for putting the great idea on here! My hubby surprised me with this bag at his retirement ceremony yesterday! What’s so special about this is that this was made from his own uniform that I’ve been laundering and sending him off in each day for the last couple of decades (well, they are the newer uniforms, so one decade). This is just super cute! I got so many compliments, even the men were checking it out. THANK YOU, THANK YOU, THANK YOU!!!
The only thing I would mention is that if you use a thin delicate lining, you probably want to put material behind the lining where the inside pockets go to make them stronger so they don’t tear out. Just something to think about if you are planning on making one of these.
Terrie Brown April 14, 2013 - 17:56
I have three children who are veterans. If I can get my hands on any of their camo shirts, this is exactly what I will make. What a patriotic statement. Thank you so much.
Angie Nixon May 27, 2013 - 21:06
Thank you for taking the time to post this tutorial! This was exactly what I needed to make a tote for my roommate from flight school, after she got out of the Army. The yellow ribbon is just the perfect touch since her husband is now deployed. I truly appreciate the time & effort it took for you to post this. Thank you sew much!
P.S. I actually made this ON Memorial Day…can’t get more patriotic than that!
shannon June 26, 2013 - 19:33
When you say remove the pockets, are you talking cut out the whole thing? Or seem rip just the front part of the pocket?
Melissa June 26, 2013 - 23:53 – In reply to: shannon
We just seam ripped them off, both the pocket and the flap above it.
marilyn miller September 01, 2013 - 21:06
My son’s wife is about to have a baby and I’m making this from an old uniform as a diaper bag. Super excited that I found this online..I was going to try to wing it! THANK YOU!
Meg December 26, 2013 - 18:56
How much would you charge to make two or three of these?
Melissa December 28, 2013 - 02:11 – In reply to: Meg
I’m sorry, Meg, I don’t do orders. But I do have a friend who can if you’re interested!
Stefanie B March 19, 2014 - 02:42
I am willing to sew some bags for anyone for a small fee. Just send me an email at sewingismytherapy@yahoo.com and we can talk logistics.
Holly March 29, 2014 - 22:41
I posted my Scout uniform version of this tote on my blog with a link back to your tutorial, I hope that’s okay. I made one of these totes a couple of years ago, using an oversized scout uniform shirt and have had constant compliments on it. Thank you so much for the easy walkthrough. 🙂
Starla J April 08, 2014 - 17:19
Thank you! I’ve been looking for a pattern! I appreciate this sooooo much!
starlajimenez.blogspot.com
Karen August 19, 2014 - 17:43
I have a question.
IS it ok to use the name plates? My daughter is having her 1st baby and I want to make two, one with each name. Both are still active and travel on and off the base. Just don’t want them to have any issues with making use of the old uniforms. Also, what about the military stamp that is IN the printing of the fabric. do we cover it?
I will post pics once they are done!!! Love this idea!
Melissa August 19, 2014 - 20:26 – In reply to: Karen
It shouldn’t be a problem using them!
Janelle September 02, 2014 - 00:08
Is there a pattern?
Melissa September 03, 2014 - 10:35 – In reply to: Janelle
The pattern is the tutorial shown here. It’s just squares and pieces used from the uniform.
Estrellita munoz November 15, 2015 - 11:47
Thank you, can’t wait to transform one of my old u iforms!
Grandma Connie November 26, 2016 - 20:45
I made a daddy diaper bag for my son. It’s the best. Mary is two now and she uses it for her daycare bag. Thank you for sharing.