Strawberry Shortcake October 28, 2011 – Posted in: Applique, Family, Sewing, Tutorials
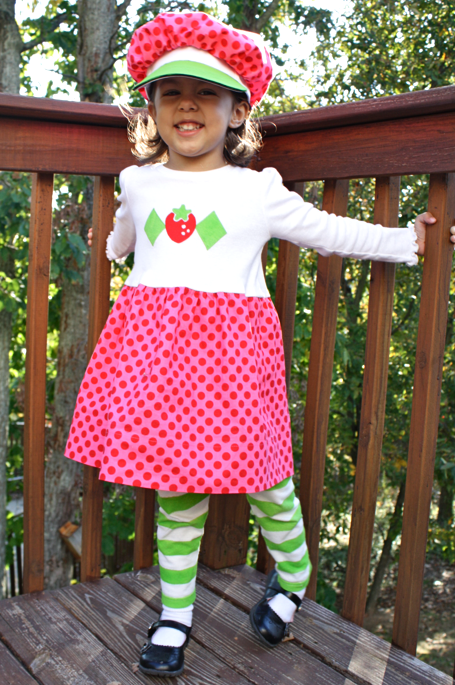
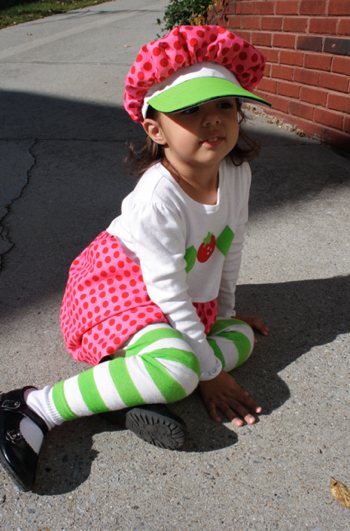
For months now Sofie’s been obsessed with Strawberry Shortcake. She’s got tons of “Strawberry Cake” toys and they’re the most treasured playthings in our vast collection. We record the show on The Hub and she spends a decent amount of time every day lost in her own little world, playing with her “friends” and asking me to visit Berry Bitty City. As her love for Strawberry grew, I knew she’d be excited to emulate her for Halloween. I started planning the costume in my mind this summer and as the weeks have grown closer, I’ve been itching to get it made. I finally caught up on my orders this week and was able to give my girl the outfit of her dreams!
It was ridiculously easy to make, taking just a few hours, and I love that it’s real clothes, not a cheap, overpriced store-bought costume that either a) doesn’t go in the washer or b) falls apart after several rounds of laundry. But my favorite thing about it is how happy it makes my girl.
She’s been wearing it all week, fighting me over any reason I ask her to take it off. She wants to sleep in it, wear it to preschool, and show everyone she knows that she is now her beloved Strawberry Cake.
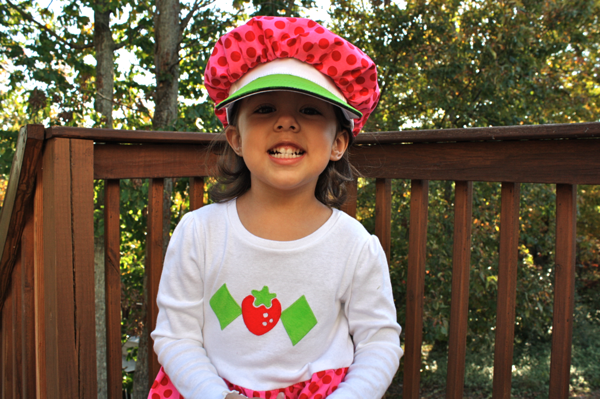
We argued a bit about whether she was going to have a hat (which she REALLY wanted) or Strawberry’s hair bow (which was more what I was thinking). But I’m a sucker for my kids, so she got her hat.
Making this costume was very inexpensive and really fun. In total I spent $17, and still have about 1/2 yard of fabric left over!
To make your own Strawberry Shortcake costume you’ll need:
-1 yard polka dot fabric. Mine is Michael Miller Ta Dot and I got it from Three Rivers Fabric on etsy.
-1 shirt. This is a great project if you’ve got a shirt that’s too short, or has a stain. I got Sofie’s at Walmart and it’s Garanimals brand (all my shirts are). It was $3.88.
-white knit fabric for the leggings.
-green fabric paint
-a visor
-lightweight interfacing
-coordinating thread
-freezer paper
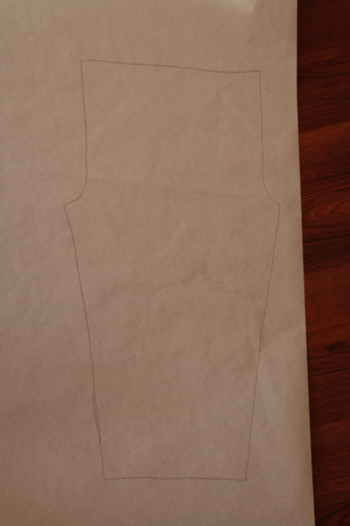
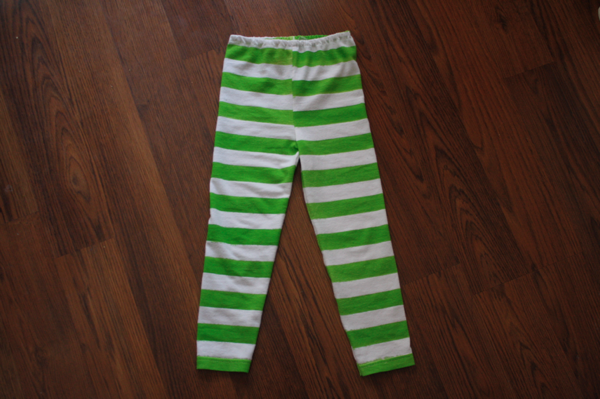
The first thing I made was her pants. I took a pair of leggings she already owned and made a pattern.
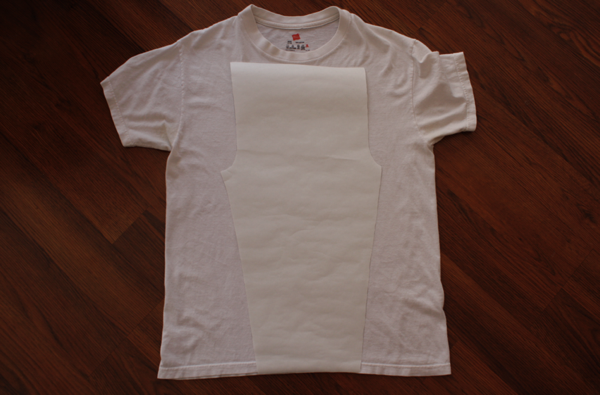
Then I took an undershirt that The Hubs didn’t want anymore and recycled it as my fabric for the leggings.
It’s a Hanes medium and was perfect for a pair of 4T pants! I used the bottom hem for the bottom of the pants.
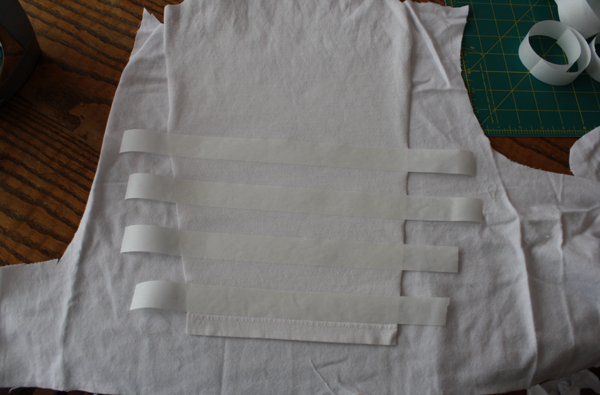
Then I used 1″ strips of freezer paper to make the stripes. I figured out I needed 11 per leg, so I cut 22 of them.
I placed a scrap piece of flannel on my table and ironed the strips on there.
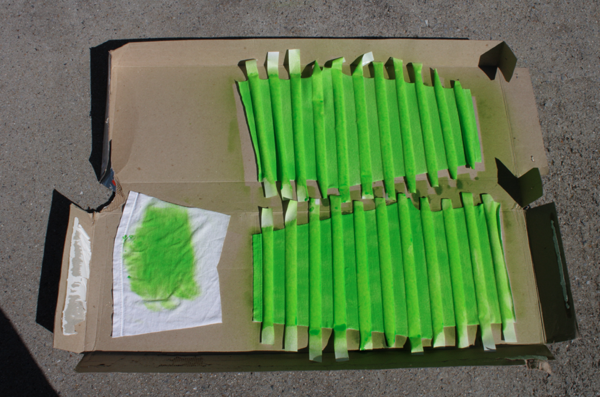
After ironing the strips to both legs, I took them, and a little scrap piece of the shirt (for the applique), and headed outside with my paint.
Now, I had grabbed a little can of green apple fabric spray paint. I was able to successfully get the first leg done, then the can…malfunctioned? It just stopped spraying. It wasn’t clogged, there was plenty of paint left, but I couldn’t get it to come out. I shook, I took the top off, I tried everything. I spent 10 minutes forcing the rest of the paint out on to the other leg and my scrap. It took the entire can to do this little bit (and left me getting creative for the hat) and I was covered in green paint. It says it washes off with soap and water, but 3 days later I still have green cuticles. So, consider yourself warned.
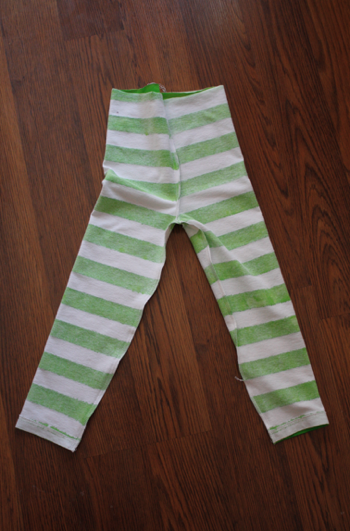
Once dry (I actually moved on to the rest of the costume while they dried, but for continuity, I’ll finish the pants first) I peeled the freezer paper off and sewed the pants together.
Like with any other pants, sew the crotch seams first (and I serged them for extra strength).
Then sew the middle seam from ankle to ankle.
Make a casing at the top and insert elastic.
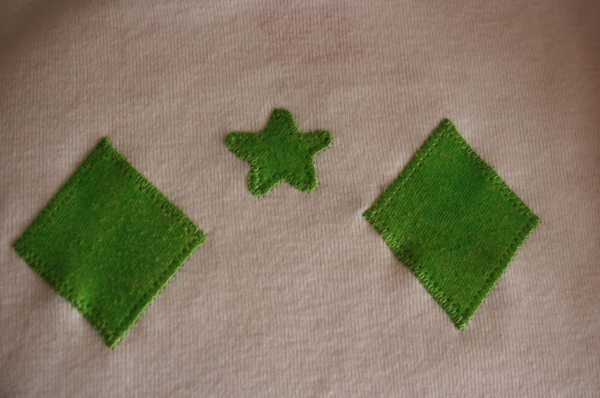
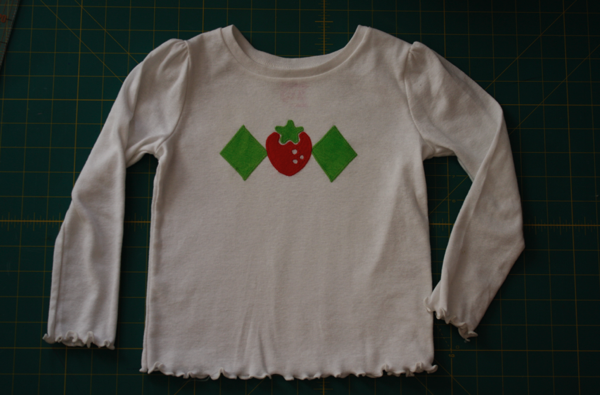
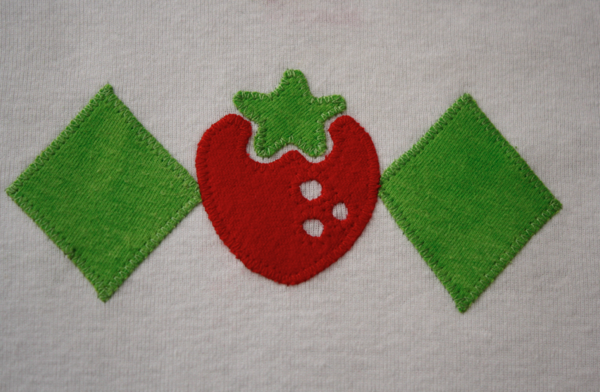
I found images online of the strawberry shape used on Strawberry’s dress, and got a diamond shape, and made my appliques.
(for more information, see my applique tutorial, and the one on appliqueing curves)
I did the green parts first,
then the strawberry. To get the white dots, I actually cut the circles out using an exacto knife.
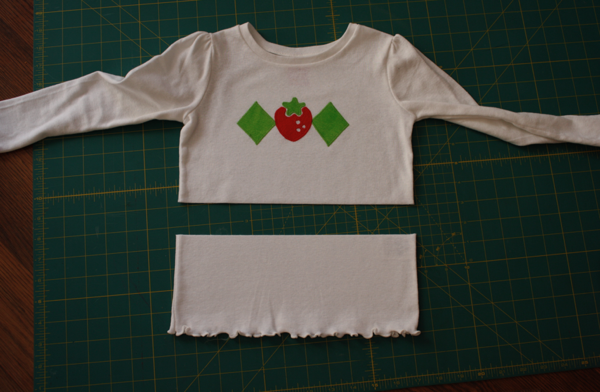
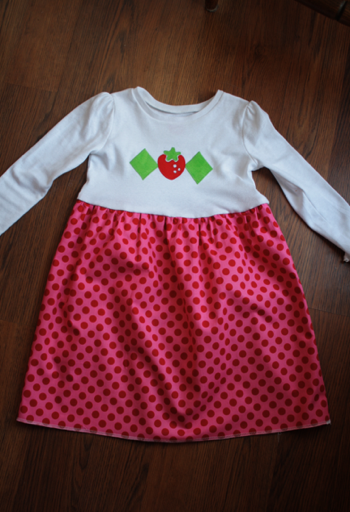
Then I held the shirt up to her and estimated where I wanted to cut it off.
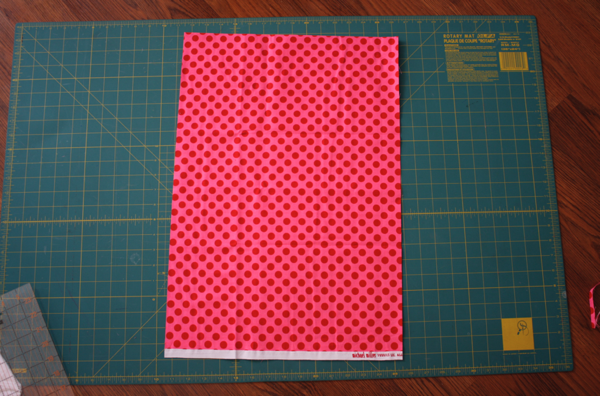
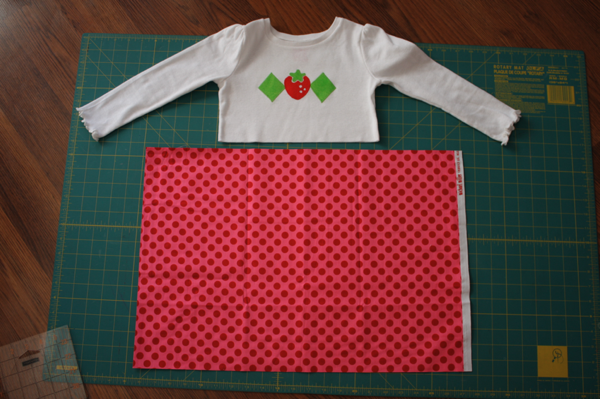
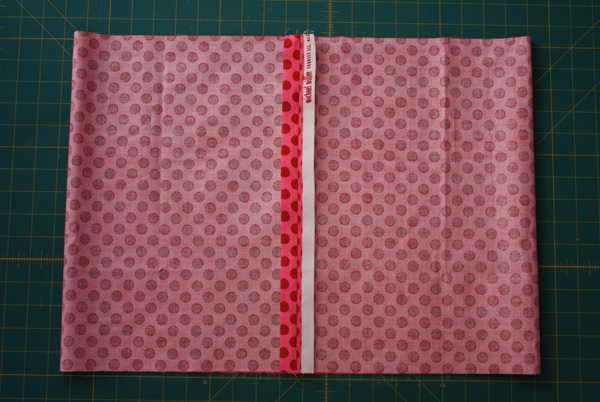
I estimated the length of the dress and cut my fabric 15″ long for the skirt.
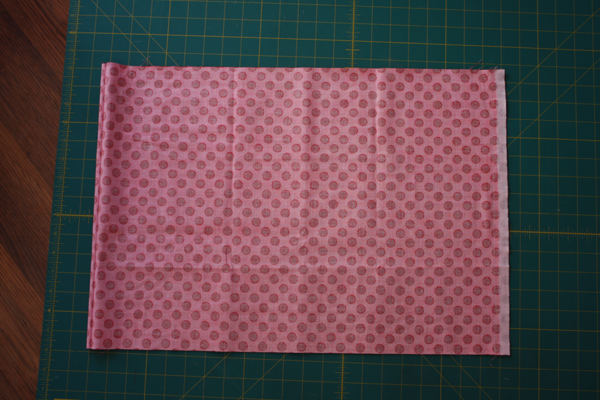
Place right sides together and sew down the side.
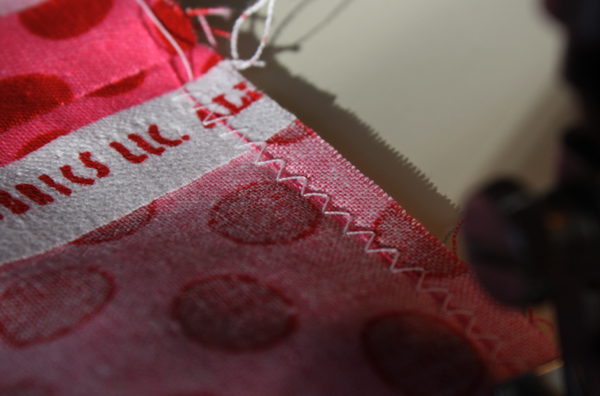
Press the seam open.
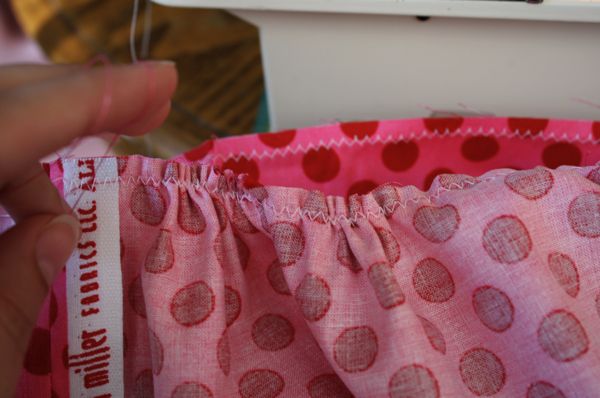
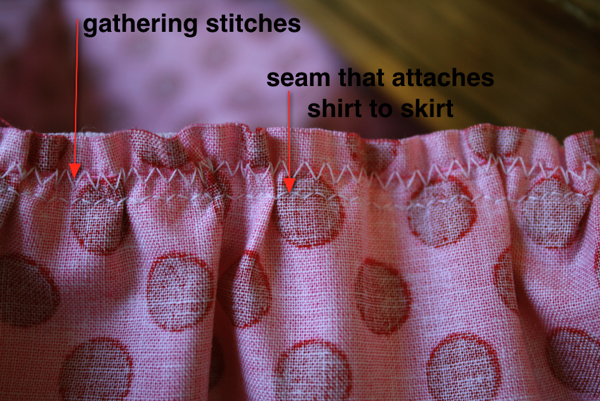
Gather the top of the skirt. **I gather using the “dental floss” method. Set your machine to a wide zigzag and sew over a piece of floss or thread.
I use a bobbin of coordinating thread that I sit in front of my machine while I zigzag.
Then all you do is pull your floss/thread piece and it gathers right up! Sooo easy.
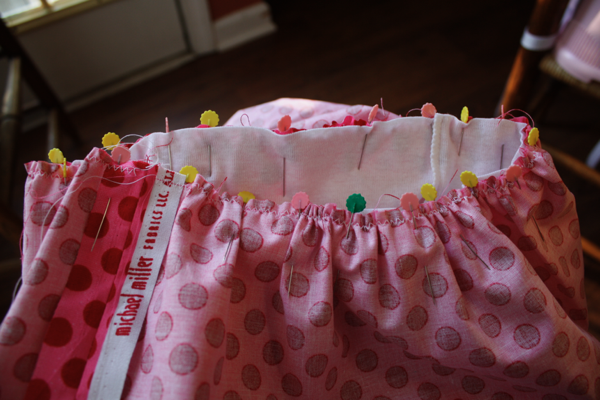
So pin the skirt to the shirt with right sides together and pull up gathers.
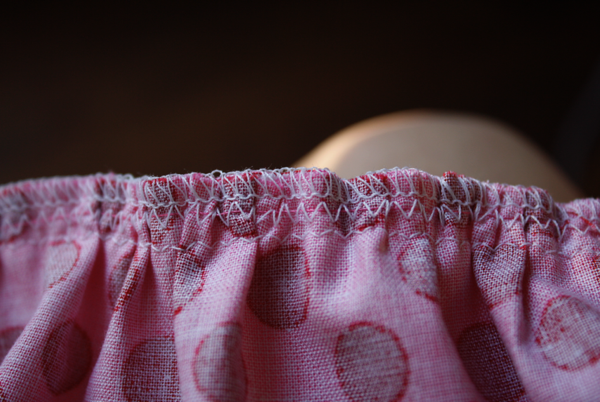
Since you’re sewing knit to cotton and it has to stretch for them to get in and out of it, I used a shallow zigzag to sew them together. You can see here the big stitch I used to gather and the smaller one under it that I used to sew the 2 pieces together.
Then I serged the seam to keep it all together and looking nice.
TA-DA!
Then hem the bottom to your desired length and it’s done!
Now for the hat. I took pictures as I went along to add to the tutorial, but I had a computer malfunction as the pictures were uploading and I lost them all. So I’m going to explain how I did it.
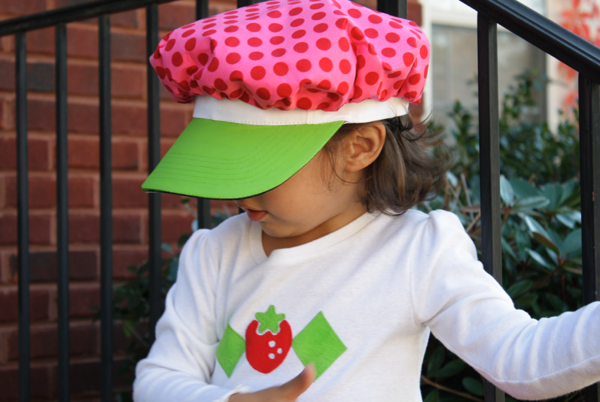
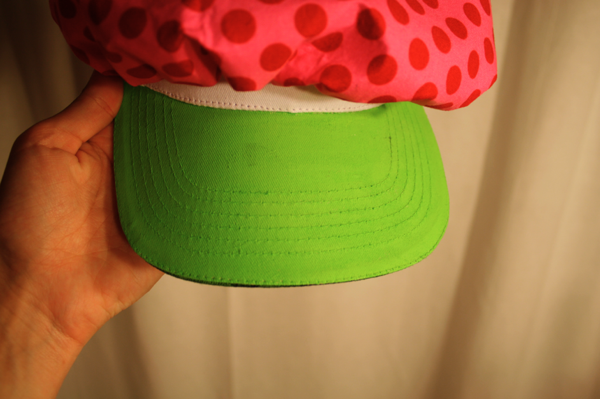
The hat itself is made from a visor that I picked up at Hobby Lobby for $1.99 (but I got it cheaper with a 40% off coupon).
I had planned on spray painting it as well, but since I ran out of paint, I had to come up with plan B. Turns out I had a bottle of Apple Barrel craft paint in green apple and it was the EXACT same shade of green! Who needs fabric paint, it worked like a charm! (ignore the little dirty place Sofie’s gotten on it since I made it)
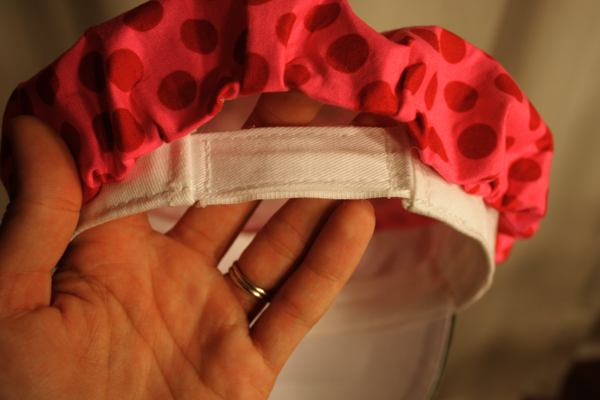
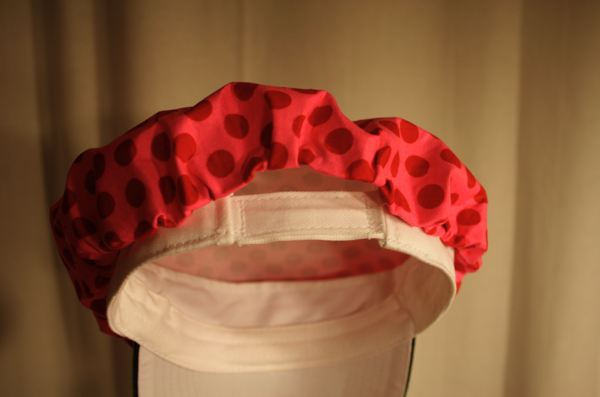
I fit it to Sofie’s head, left a little wiggle room, and velcroed it at the right place. Then I cut off the excess velcro pieces and sewed it together.
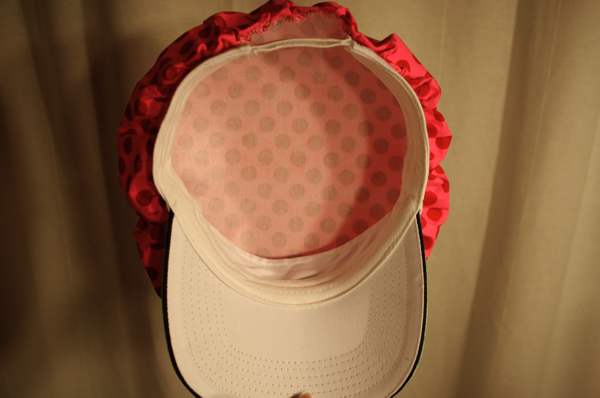
I cut a circle of fabric that was twice the diameter of the hat (it was 7″, so I made a 14″ circle), and attached a piece of lightweight fusible interfacing the same size. I wanted the hat to hold it’s shape and not be floppy. Then I serged around the edge of the circle and gathered it using the same technique I used on the dress.
Using a fabric pencil, I marked 1 inch from the bottom all the way around the visor, then hot glued the gathered hat top to the visor along the line. I didn’t glue the very back to the visor to allow for it to expand with her head as she grows.
And Strawberry Shortcake is complete!
Every morning as she dons her new favorite outfit, she quietly asks me if it’s Halloween yet. I can’t wait for the day I finally get to tell her, “yes.”











31 Comments
ELLEN October 28, 2011 - 10:39
TOTALLY BEAUTIFUL!!! so impressed! Goodness but where do you fine the time???
My daughter would love it!!!
Bohemian Hijabi October 28, 2011 - 13:23
Strawberry Shortcake was my absolute favorite character when I was growing up! I had watches, glasses, nightgowns, and even a doll whose breath smelled like strawberries when you squeezed her stomach. So I totally get Sohpie’s fascination. I love the costume. Spraypainting the green stripes was pure genius! She looks adorable.
Michelle W October 28, 2011 - 14:28
Oh WOW, that is ADORABLE. I remember dressing up as Strawberry Shortcake for Halloween many, many years ago, but I think Sofie’s is way cuter than mine!
Charlene October 29, 2011 - 21:20
I love love love that last picture of her!!! I’m so excited for her!
Melissa October 30, 2011 - 22:16
Super freaking adorable!
Amanda G. November 03, 2011 - 22:02
I love this! My daughter is going to want one if she sees this. So sweet! I love how you used your hub’s undershirt for leggings and painted the stripes, brilliant! I am going to be referring to your applique tutorial as well. Thanks for sharing!
Ines November 05, 2011 - 21:09
She looks so adorable in the costume! My daughter wanted to be Strawberry Shortcake for this Halloween and we used masking tape and craft paint to make her leggings. I made her outfit too, but yours came out much better!
Kristina November 07, 2011 - 19:47
Just stumbled on your blog & I absolutely love this strawberry shortcake outfit. My 4 your would love it, too bad Halloween has pasted. Thanks soo much for sharing!
Edymariel March 19, 2012 - 16:18
I follow your instructions and create on to my daughter strawberry birthday!! Always love it!!
Stephanie March 31, 2012 - 00:50
My daughter was Strawberry Shortcake for Halloween! I made the entire costume and they look pretty similar. Good job! I made the hat from nothing and it was so big and fluffy, like a pillow w/ a brim. lol So much fun.
Maddy June 02, 2012 - 23:14
You are so creative! I have been searching online for a Strawberry Shortcake dress-up costume to buy for my 10 year old daughter and happen to see your blog:))) What an inspiration you are, I am definitely going to frequent your blog from now on!
Sandy September 09, 2012 - 17:58
I tried the stripes and I have light green and dark green… no white. I used regular freezer paper from the grocery store. Correct? Ideas?
Melissa September 12, 2012 - 16:38 – In reply to: Sandy
Yes, just regular freezer paper. I have no idea why it bled through! What kind of paint did you use? I need to make this costume over again for a friend, so I’ll try some different things and see if I can find a better method. I’m so sorry that happened!
Deb September 12, 2012 - 16:42
Thank you so much for the great ideas. My little girl wants to be strawberry shortcake and I’ve been racking my brain on how I was going to do this. It’s perfect!!! I love how you incorporated longer sleeves because it can get so cold outside on Halloween where I’m at.
Yulia September 20, 2012 - 12:26
Beautiful costume! I want to make one for my daughter this year. Can you tell me where exactly you found the strawberry shape for applique? Thank you.
Melissa September 20, 2012 - 20:49 – In reply to: Yulia
I hunted around through Google images for party supplies and things until I found the shape I wanted. I blew up the image on my computer to the size I wanted and went from there. Something like this: http://www.1partysuppliesandfavors.com/store/i/is.aspx?path=/images/products/66710.jpg
Laura September 28, 2012 - 01:04
Thanks so much for this tutorial. I am by no means a seamstress, a straight line is about as much as I can handle and I knocked this costume out in about a total of 4 hours. I cheated and bought white leggings already made and added the green stripes and painted the green diamonds directly on the shirt and added an iron on applique strawberry. So easy and quick, the hat really adds to the outfit and my 5 year old loves it!
Mindy Hale October 06, 2012 - 16:14
I LOVE, LOVE, LOVE IT!! Thank you so much for sharing! My daughter wanted to be Strawberry Shortcake but we didn’t have any luck finding one in the stores! I am making this for my daughter for her Halloween Costume!! Thanks again!!
Damiane October 10, 2012 - 16:18
OH MY GOODNESS!!!!!
you are the best!
I admire your creativity and attension to detail!!!!
I wish had an ounce of your creativity! Thanks so much for this tutorial!
I bought a lot of minky fabrics to make dresses out of long sleeves body suites for my 9 month old daughter but they have yet to be introduced to my sewing machine!
thanks to you they will meet today!!!
😉
keep up with the great work!!
Jennifer October 21, 2012 - 18:09
Just finished my daughter’s Strawberry Shortcake Halloween costume, thanks to you!! I don’t know how to applique, so I used fabric paint to do the design on the shirt and it turned out great! I also bought some tights that are green and white striped, so I didn’t have to worry about that step. Your directions for the dress and hat were perfect!! Thanks so much!
Deann D October 21, 2012 - 21:30
Thanks for the tutorial. Made this for my 15 month old and it is awesome! I couldn’t find freezer paper so I just used painters tape and it worked perfect! The details have made this better than the expensive store bought one!
Thanks again!
Elizabeth October 26, 2012 - 13:52
How do you decide how wide to cut the fabric for the skirt so there are enough gathers? Is there a formula, like measure the waist and double it or add 50%, to get the right fullness? I don’t want to cut it too short and I don’t want to be gathering more than I need really.
Melissa October 27, 2012 - 02:42 – In reply to: Elizabeth
I used the width of the fabric for the width of the skirt. I usually don’t cut anything off and I’m able to skip the step of serging the edges because they stay finished from the selvage.
Patty November 02, 2012 - 20:34
Thank you! I used your directions for the dress and hat and my four-year-old’s costume was perfect! Like Jennifer, I purchased striped tights and used glittery fabric paint for the green diamonds along with a sequined strawberry iron-on. It didn’t exactly match Strawberry’s strawberry but my daughter loves all things sparkly so she was happy.
Several friends assumed that I had purchased the costume. Not bad for someone who hadn’t used a sewing machine in over 10 years!
Mary November 19, 2012 - 22:02
You have to be the best Mom ever! I am so impressed.
Julieregan August 14, 2013 - 03:01
Simply gorgeous my little girl will love this and u ake it look so easy all I have to do is go buy the material
Jennifer September 28, 2013 - 22:49
My girls decided to be Strawberry Shortcake and Blueberry Muffin for Halloween this year. I decided to make them dresses that they could wear anytime. I ran across your blog in my search and thought this was going to be an easy project for Strawberry Shortcake.
I bought the exact same fabric paint and white knit since my daughter is 8. (There was no way I couldn’t get leggings for her out of an old t-shirt.) I’m glad I tested it on the scrap knit first because no matter what I did the fabric paint bled under the ironed on freezer paper. It has been rather frustrating. I finally searched online for green/white stripe knit fabric to make the leggings. I’m thankful I didn’t ruin fabric so my girls will each get a pair of white leggings out of the deal. I guess that fabric paint doesn’t work well on all fabric types. The appliques and everything else have turned out perfect. Thanks for the inspiration!
Melissa September 29, 2013 - 01:28 – In reply to: Jennifer
It’s just crappy paint, I think! It’s too bad there aren’t more options. I think maybe painting on fabric paint would be a better option. My 3 year old is wearing this costume this year and she’s so excited…and I’m thrilled it’s going to see another Halloween! Hope your girls enjoy their dresses!
Gali February 24, 2014 - 15:12
Melissa, THANK YOU SO MUCH FOR THE FAB TUTORIAL!
I’m in an awe of impression of your creativity and awesome work, having (almost) completed the outfit for my 5 year old…
I’m so happy to have come across this tutorial!
I used fabric paint and did the top with a stencil cut with my Silhouette, and but other than that – did it step by step in accordance with your instructions!
Thanks!
Gali
Lindsay September 16, 2014 - 08:34
Can’t wait to try the hat, I figured i could handle the dress but wasn’t sure how to attempt the hat. Thanks for sharing 🙂
Joyce Shelden September 16, 2014 - 15:26
What a great tutorial! I am so happy to have found your blog and web site!! Don’t know how you do all this with your growing family but I appreciate your efforts to help and inspire others.
Sincerely,
Joyce