Rapunzel Wig January 20, 2012 – Posted in: Tutorials
Are you working on your first Christmas project? I can’t wait to see them!
I was laying in bed recently chatting with The Hubs while he worked, aimlessly bouncing around blogs, websites, Pinterest and everything inbetween. I didn’t realize he was paying attention to what I was doing until I was looking at this tutorial and he said, “You are making that, right?”
How do you say no to that?! I knew Sofie would be absolutely CRAZY about the idea, and I was right!
It was pretty quick to make, and she can get it off and on herself, which is huge for us both.
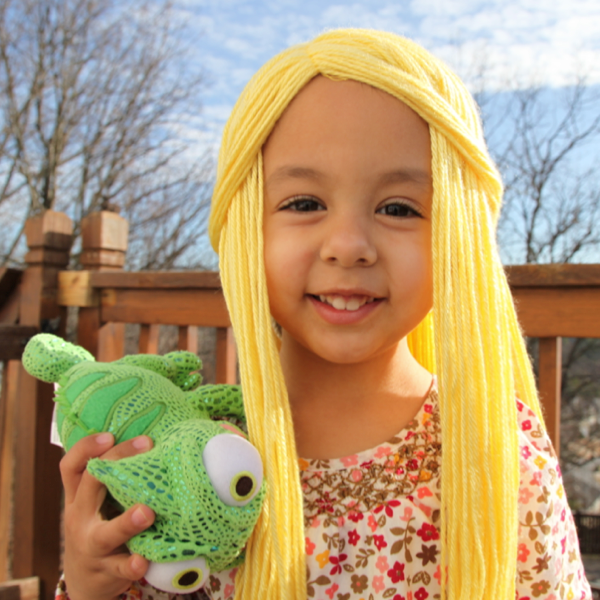
She’s always trying to do things with that hair. Open doors, grab her cup from across the room, you name it. And it doesn’t matter how long she wears it, it’s so weird to see my sweet brunette with blonde locks!
She’s been so sweetly excited about wearing this wig. After having her Mommy making things for everyone one else, she’s relishing my full creative attention lately. When she’s wearing her Rapunzel hair, she bats her eyes and asks, “Where’s the dress?” Gimme time, little girl.
This wig is ridiculously easy to make! I got a cream stocking cap at Walmart for $1.27 and used it for the base. Tights are too hard for Sofie to put off and on, so I wanted something she could manipulate herself. I also used 2 skeins of yarn I also got from Walmart. Caron brand, lemon color.
I put the hat on her head and folded it up until it fit her skull pretty close.
Then I marked it with a pen,
and stitched it down with a wide zigzag.
Then I put it back on her head, with the folded part in front (to make sure it didn’t stick out funny),
and marked the side part, then the drew a line from ear to ear. I used a yellow crayon so my marks would blend into the hair.
I placed 2 of my ladder back chairs 39″ apart and wrapped the yarn around them. I did one skein at a time (and only used about half of the second). If you don’t have 2 things to use, get your husband, mom, sister, someone to hold their hands the desired length apart and wrap around them. I cut one end of the yarn to give me 78″ length pieces.
Then I threaded a needle with regular sewing thread and starting at the very front of the hat, started placing hair and sewing it onto the part. I put it over my knee to sew.
To give it a little more volume, I placed anywhere from 2-4 pieces of yarn together for each stitch I made. It took me about 15 minutes to do the part.
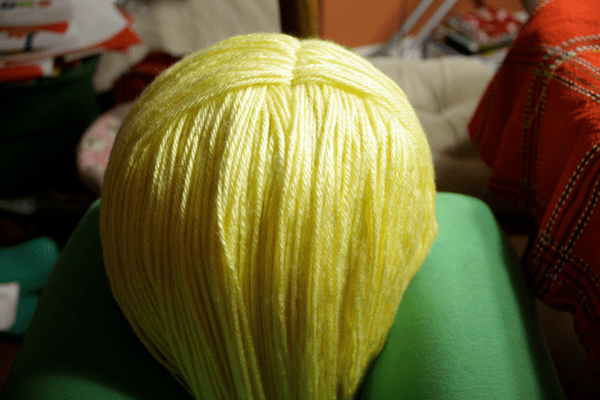
Then I moved onto the crown. Once I started this point, I was having a hard time keeping it on my knee, so I put the hat on a ball. I didn’t want the stitches to show, so starting in the middle of my line, I laid the yarn pieces diagonally and stitched them down 1 at a time, so the top of the yarn would fall over the thread hiding it.
I stopped at the top of the ear, where my line stopped. Then I did the same thing to the other side, creating the back of the hair.
Then to fill in the top of the head more, I started at the part and moved diagonally towards the eye on each side. I did this second row down to the same point as the first.
It now covers the back of the head when all the hair is down.
When I put it on Sofie at this point I realized that as she moved the yarn moved and I could see big spots of the hat. So I decided to sew some of them down so they kept the hat covered and the top layer of hair could move freely.
I started on one side of the part, I pulled up half the hair and moved it out of the way.
Then I found where the crown pieces met the sides and started there.
Using my same needle and thread, I just quickly whipped across the yarn, attaching it to the hat.
I did the same across the other side, and along the back.
Then I pulled two pieces from the front on each side and secured them in the back with a little piece of yarn. She absolutely loves it and honestly, so do I!


18 Comments
Jenn January 20, 2012 - 12:07
Super cute!!! She makes an excellent Rapunzel!
Serendipity January 20, 2012 - 19:28
That is sooooo cUtE!!!! You are now officially a wig maker!!! I like how you stitched it to a stocking cap so she could put in on and off herself. Nice job!!
Chelsea January 23, 2012 - 15:52
What a great idea! You get an A+ for being a cool mom. 😉
Maddy June 08, 2012 - 06:57
I recently made a rapunzel dress for my daughter but she didn’t want to wear a shop bought wig as it’s stiff and ugly… your excellent tutorial is inspiring me to create her a wig too:)))
Kimira October 03, 2012 - 01:34
Awesome. I must do this
krisztina January 23, 2013 - 06:10
A big THANKS from Hungary!My daughter’s wish was a Rapunzel wig,but I did not know,how to make it…until now.Thanks!!!!
camilla January 23, 2013 - 09:01
I just had to Pin this to my “kids” board.
Pratyusha April 01, 2013 - 19:21
Thank you. o.o I’m an artist and for the face-art stuff I do I was thinking to make some wig stuff. You just helped heaps! Thanks!
– A crazy teen ^_^
Bek @ Just For Daisy May 25, 2013 - 07:34
Oh wow! I’m going to HAVE to make this for my daughter’s upcoming Rapunzel/Tangled party! 🙂 Thanks so much for sharing such a detailed tutorial! 🙂 Off to buy supplies! 🙂
Bek @ Just For Daisy August 12, 2013 - 08:25
I did it I did it! 🙂 Would love for you to pop over and take a look! I’ve linked back to your fabulous tutorial! Thanks again for sharing! 🙂
http://justfordaisy.blogspot.com.au/2013/08/disney-tangled-party-happy-3rd-birthday.html
Cinthya Grey September 04, 2013 - 18:01
I live your idea but i have no idea how to do this can you help me please
Melissa September 04, 2013 - 21:35 – In reply to: Cinthya Grey
I’m sorry, no, I’m not taking orders at this time. Perhaps you have a friend or relative who could help?
Aida September 29, 2013 - 01:11
Hmm. This could be adapted to make a Wednesday Addams wig with braids, huh?
jhansi October 19, 2013 - 07:12
thank u sooooooooooo much its lovely and gr8
Debbie @ PinkTexasChick October 30, 2013 - 10:14
I’ve been looking around for lots of Rapunzel wig ideas and so far yours is the easiest for my brain to comprehend! 🙂
I just made my daughter’s costume but now she wants to be Rapunzel just for school for the book character parade. Not sure if I can pull this off in one night. If not, I’ll have ready for princess play time. 🙂
M November 20, 2013 - 09:25
Made this for my niece. 🙂 Thanks for the tutorial!
http://disappearanceshappen.com/2013/07/10/apple-pie-as-rapunzel/
Veronica August 14, 2014 - 15:35
Thanks for this idea I want to make my daughter an Ariel wig since that’s her favorite. Hoping it works out” 🙂
Alyssa Sellen October 21, 2015 - 16:10
This worked great for our princess bubble gum halloween coustume. We just used pink yarn! Thanks!